Getting Started
Send notifications to a user’s device locally from your app using a trigger, like a date, time interval, or when they enter / leave a specific location.
Before you get started, make sure to import the User Notifications library. You can add this to the top of your Swift file.
In order to send notifications to a user, you need the following
Permission—request the user for permission to send notifications
A Trigger—when do you want to send the notification?
The notification's contents—what the notification will display and any actions the user can take from the notification.
Permissions
In order to deliver a local notification, you will need to request permission as a user may consider notification-based interactions disruptive. You may know this as the familiar ""App Name" Would Like to Send You Notifications" alert you encounter when using an app that wants to send notifications.
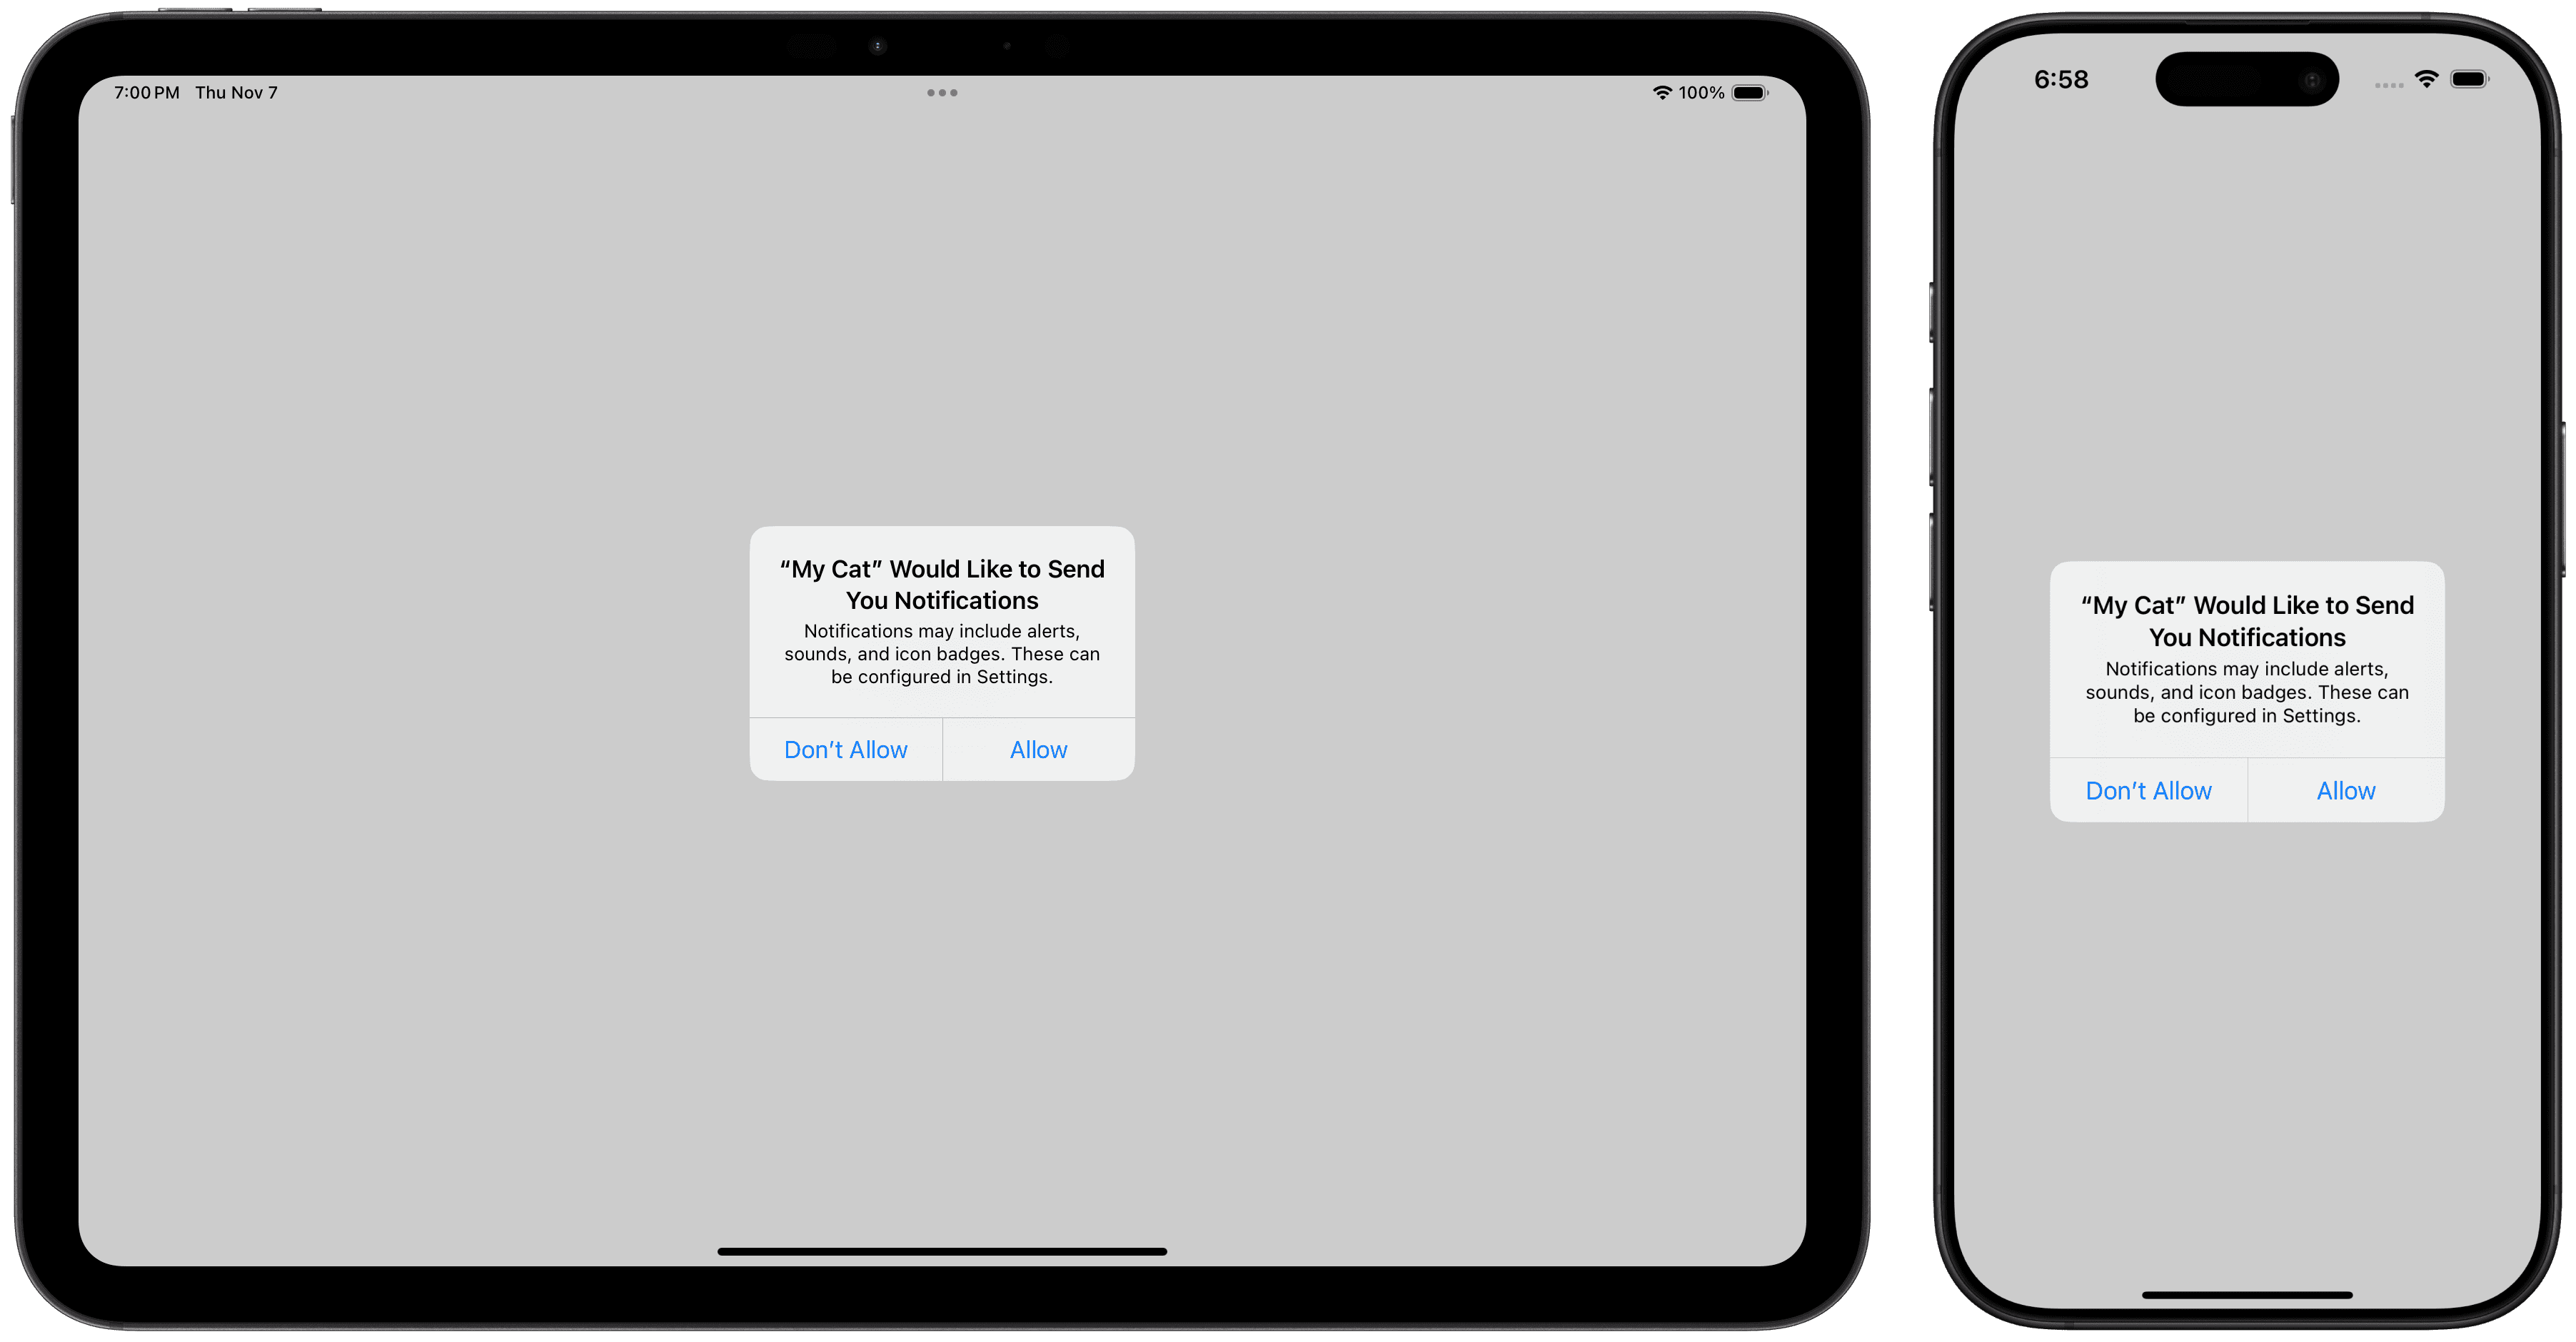
Asking for Permission
When requesting authorization, choose options that your app will require.
.badge: Gives you the ability to update the app’s badge, the number you might see in the top corner of an app icon..sound: Gives you the ability to play sounds when a notification is delivered..alert: Gives you the ability to display alerts..carPlay: Gives you the ability to display notifications when the user is in a car, using CarPlay..criticalAlert: Gives you the ability to play sounds for critical alerts..providesAppNotificationSettings: An option indicating the system should display a button for in-app notification settings..provisional: Gives you the ability to post non-interrupting notifications provisionally to the Notification Center.
Use the following method to request authorization, and supply it with the necessary options.
In the following example, a Button can be used to request authorization.
Provisional Permissions Request
Provisional permissions requests can help a user make a decision on whether or not to enable notifications after trying it out. Think of this like a trial notification.
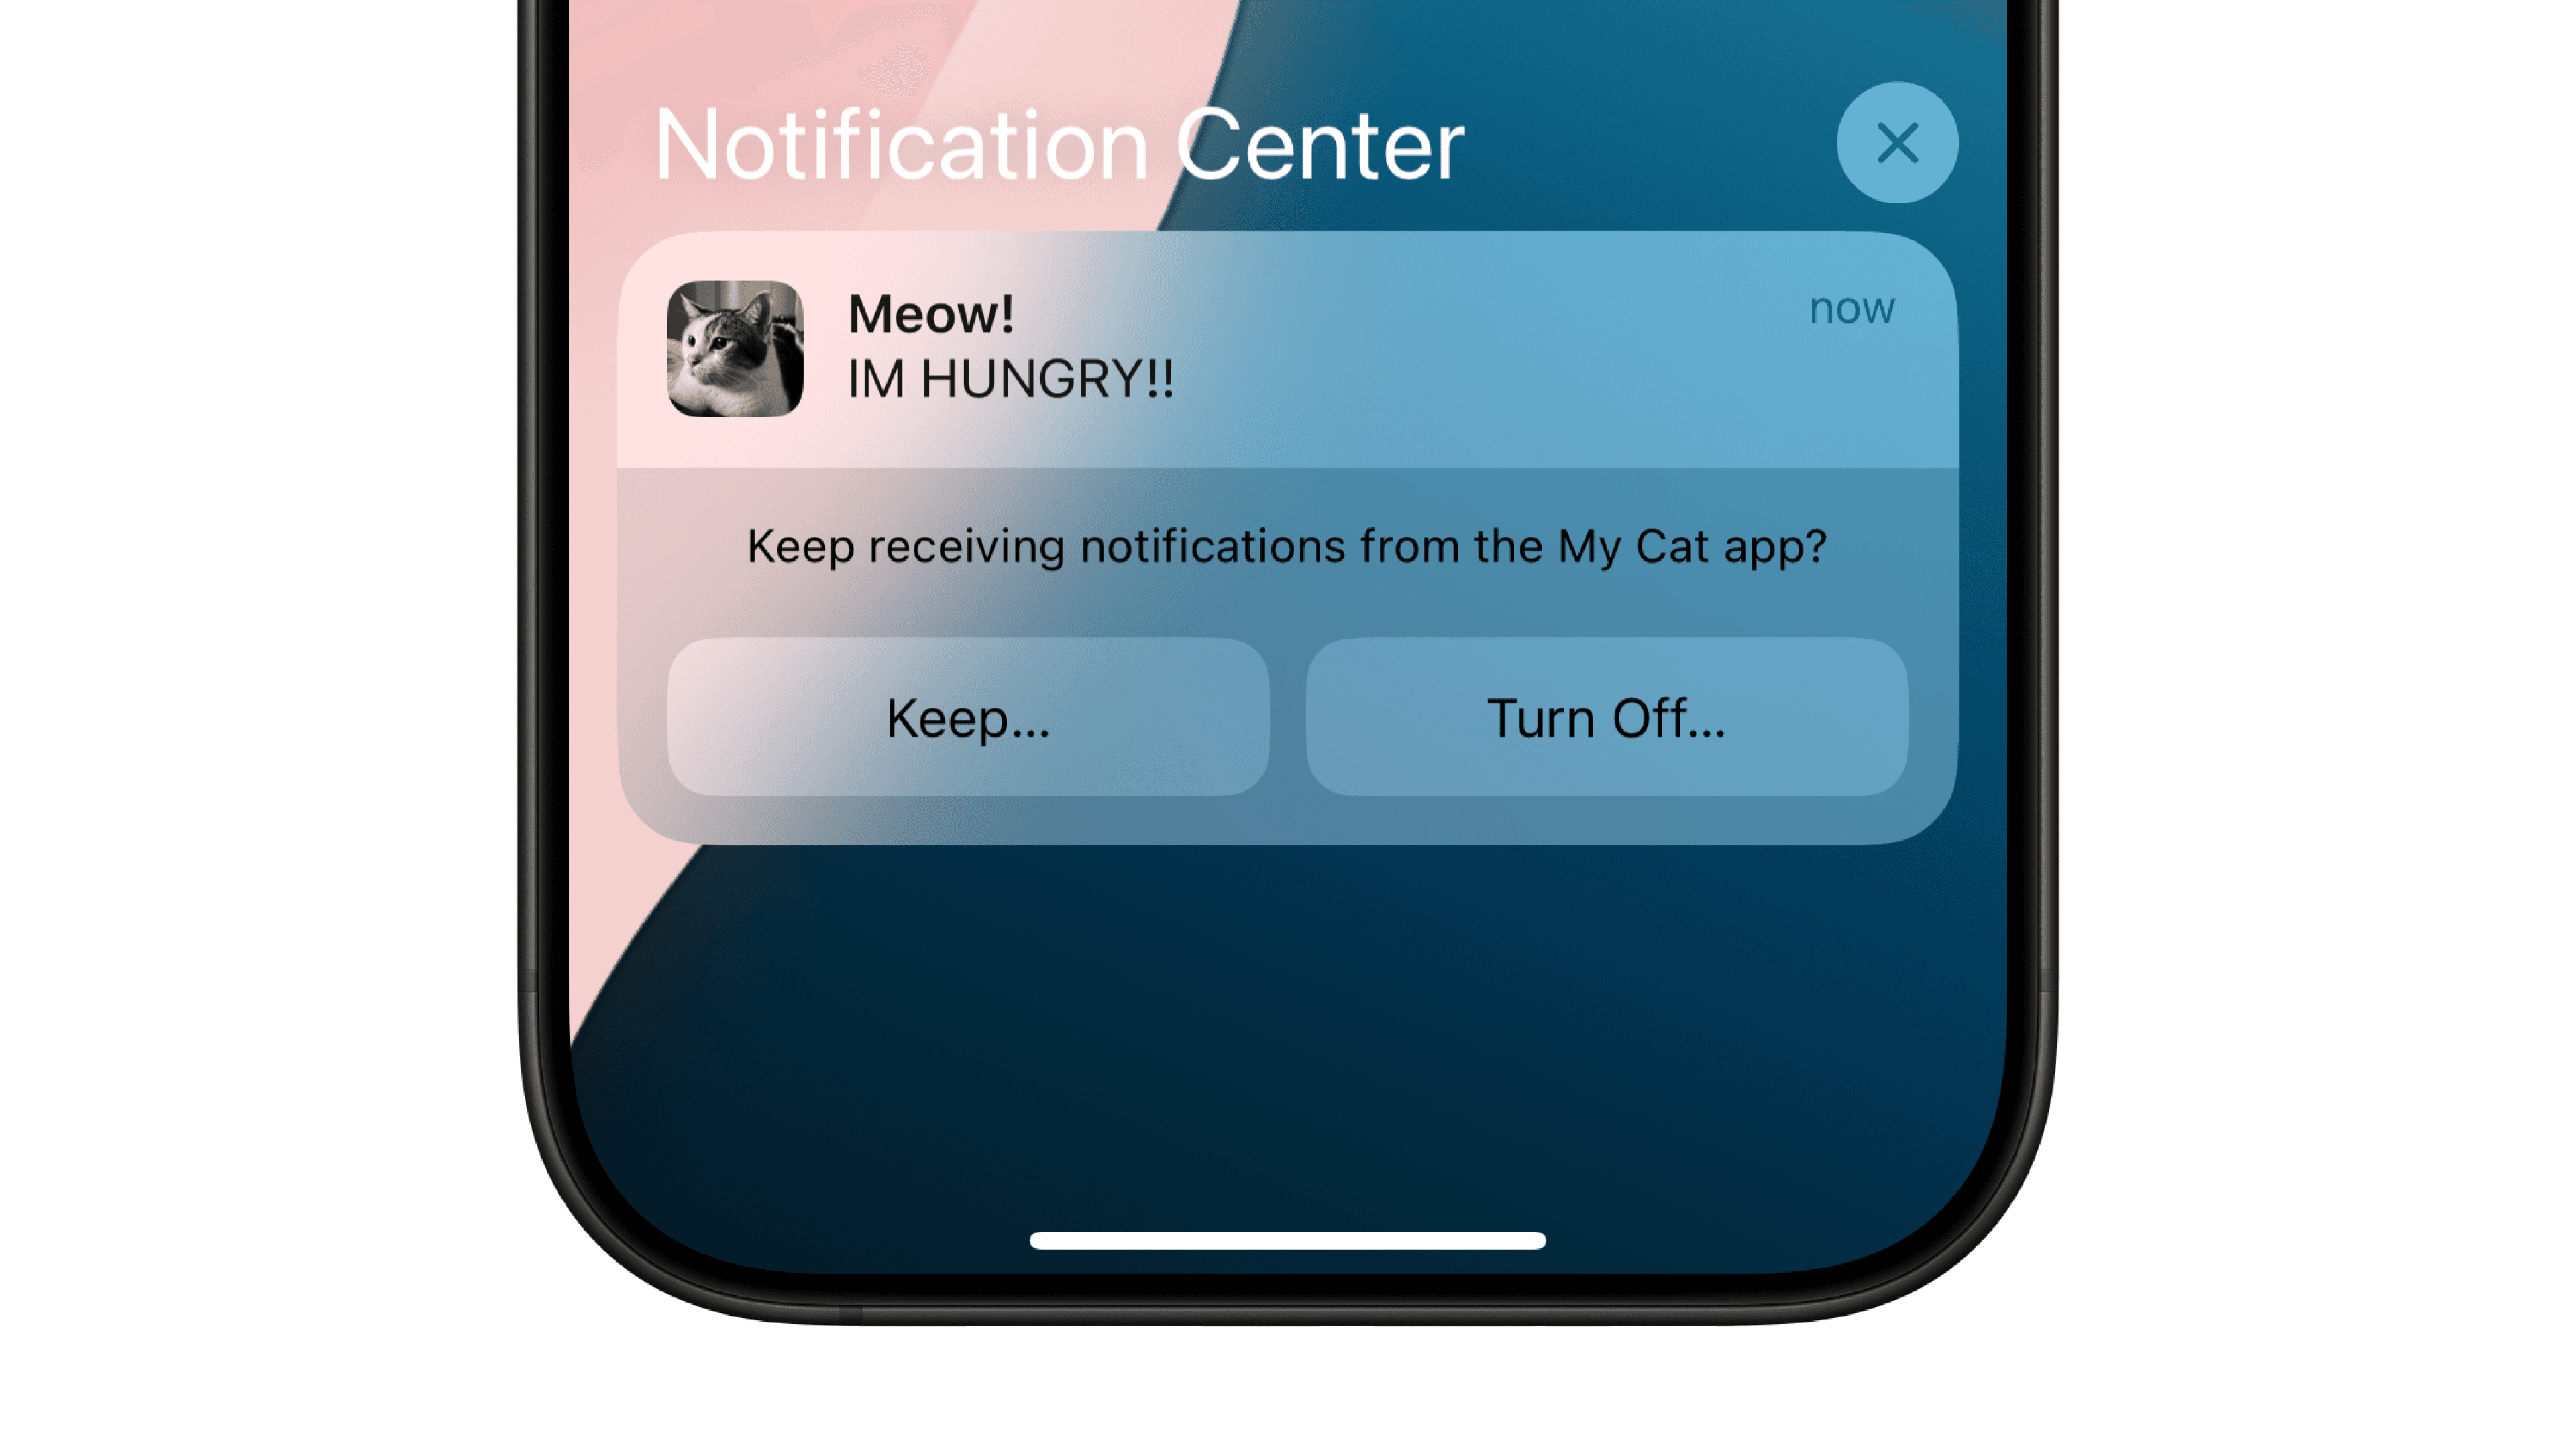
When you send a provisional notification, a user is presented with 2 options—"Keep…" and "Turn off…".
Keep…: The user is prompted with 2 options—Deliver Immediately or Deliver in Scheduled Summary.
Deliver Immediately: Your notifications will be delivered immediately, quietly.
While your app is granted permission to deliver notifications, your app does not have permission to show alerts, play sounds, or change the badge of the app icon.
Your notification only appears in the notification center history unless they change their notification settings.
Deliver in Scheduled Summary: Your notifications only appears if the person has Scheduled Summary On in Settings.
Turn Off…: The system confirms the selection before denying your app authorization to send additional notifications.
To create a provisional permission request, add the .provisional option.
When requesting authorization, the user does not get a prompt for permission to receive notifications. Instead, the first time you call this method, it automatically grants authorization.
Until the user either explicitly select "Keep…" or "Turn Off…", the authorization status remains .provisional. As the authorization status can change at any point, check the status before scheduling local notifications.
Checking Permissions
Before sending a notification, make sure to check the authorization status.
In the following example, you can show and hide a Button based on whether or not sending notifications is authorized.
Triggers
Triggers help you determine when to push a notification. There are 3 triggers—after a time interval, at a date, and when the user enters/leaves a specific location.
Notably, the notification only gets sent if the app is not open.
After a Time Interval
To trigger a notification after a time interval, after gaining permission, you can set a time interval to fire the notification.
You can set the repeat parameter, when true, the notification will be triggered every X seconds, where X is the time interval you set.
In the following example, a notification is delivered 5 seconds after the button is tapped.
Using a Calendar Trigger
To trigger a notification using a calendar trigger, after gaining permission, you can specify date components as the trigger. If the current date and time matches the specified date components, the notification will be triggered.
You can set the repeat parameter, when true, the notification will be triggered every time the current date and time matches the specified date components.
Date components provide you with a great way to deliver notifications based on the user's date and time. In the following example, a notification is delivered at midnight on New Year's Day every year.
When Entering/Leaving a Location
You can deliver a notification when the user enters or leaves a location. To start, import the Core Location library.
To create a notification with a location trigger, you will to supply…
the latitude and longitude of the location,
a radius (in meters) to trigger the notification when the user enters, and
whether or not you want to send the notification when the user enters, exits, or both.
In the following example, a notification is sent every time when the user enters a 2 kilometer radius around a pet store.
Customizing Notification Content
To create a notification, you must supply it with a content.
To customize the content, create a UNMutableNotificationContent. This allows you to update the content and set various properties in it.
Title, Subtitle, and Body
You add a title, subtitle, and body to your notification.
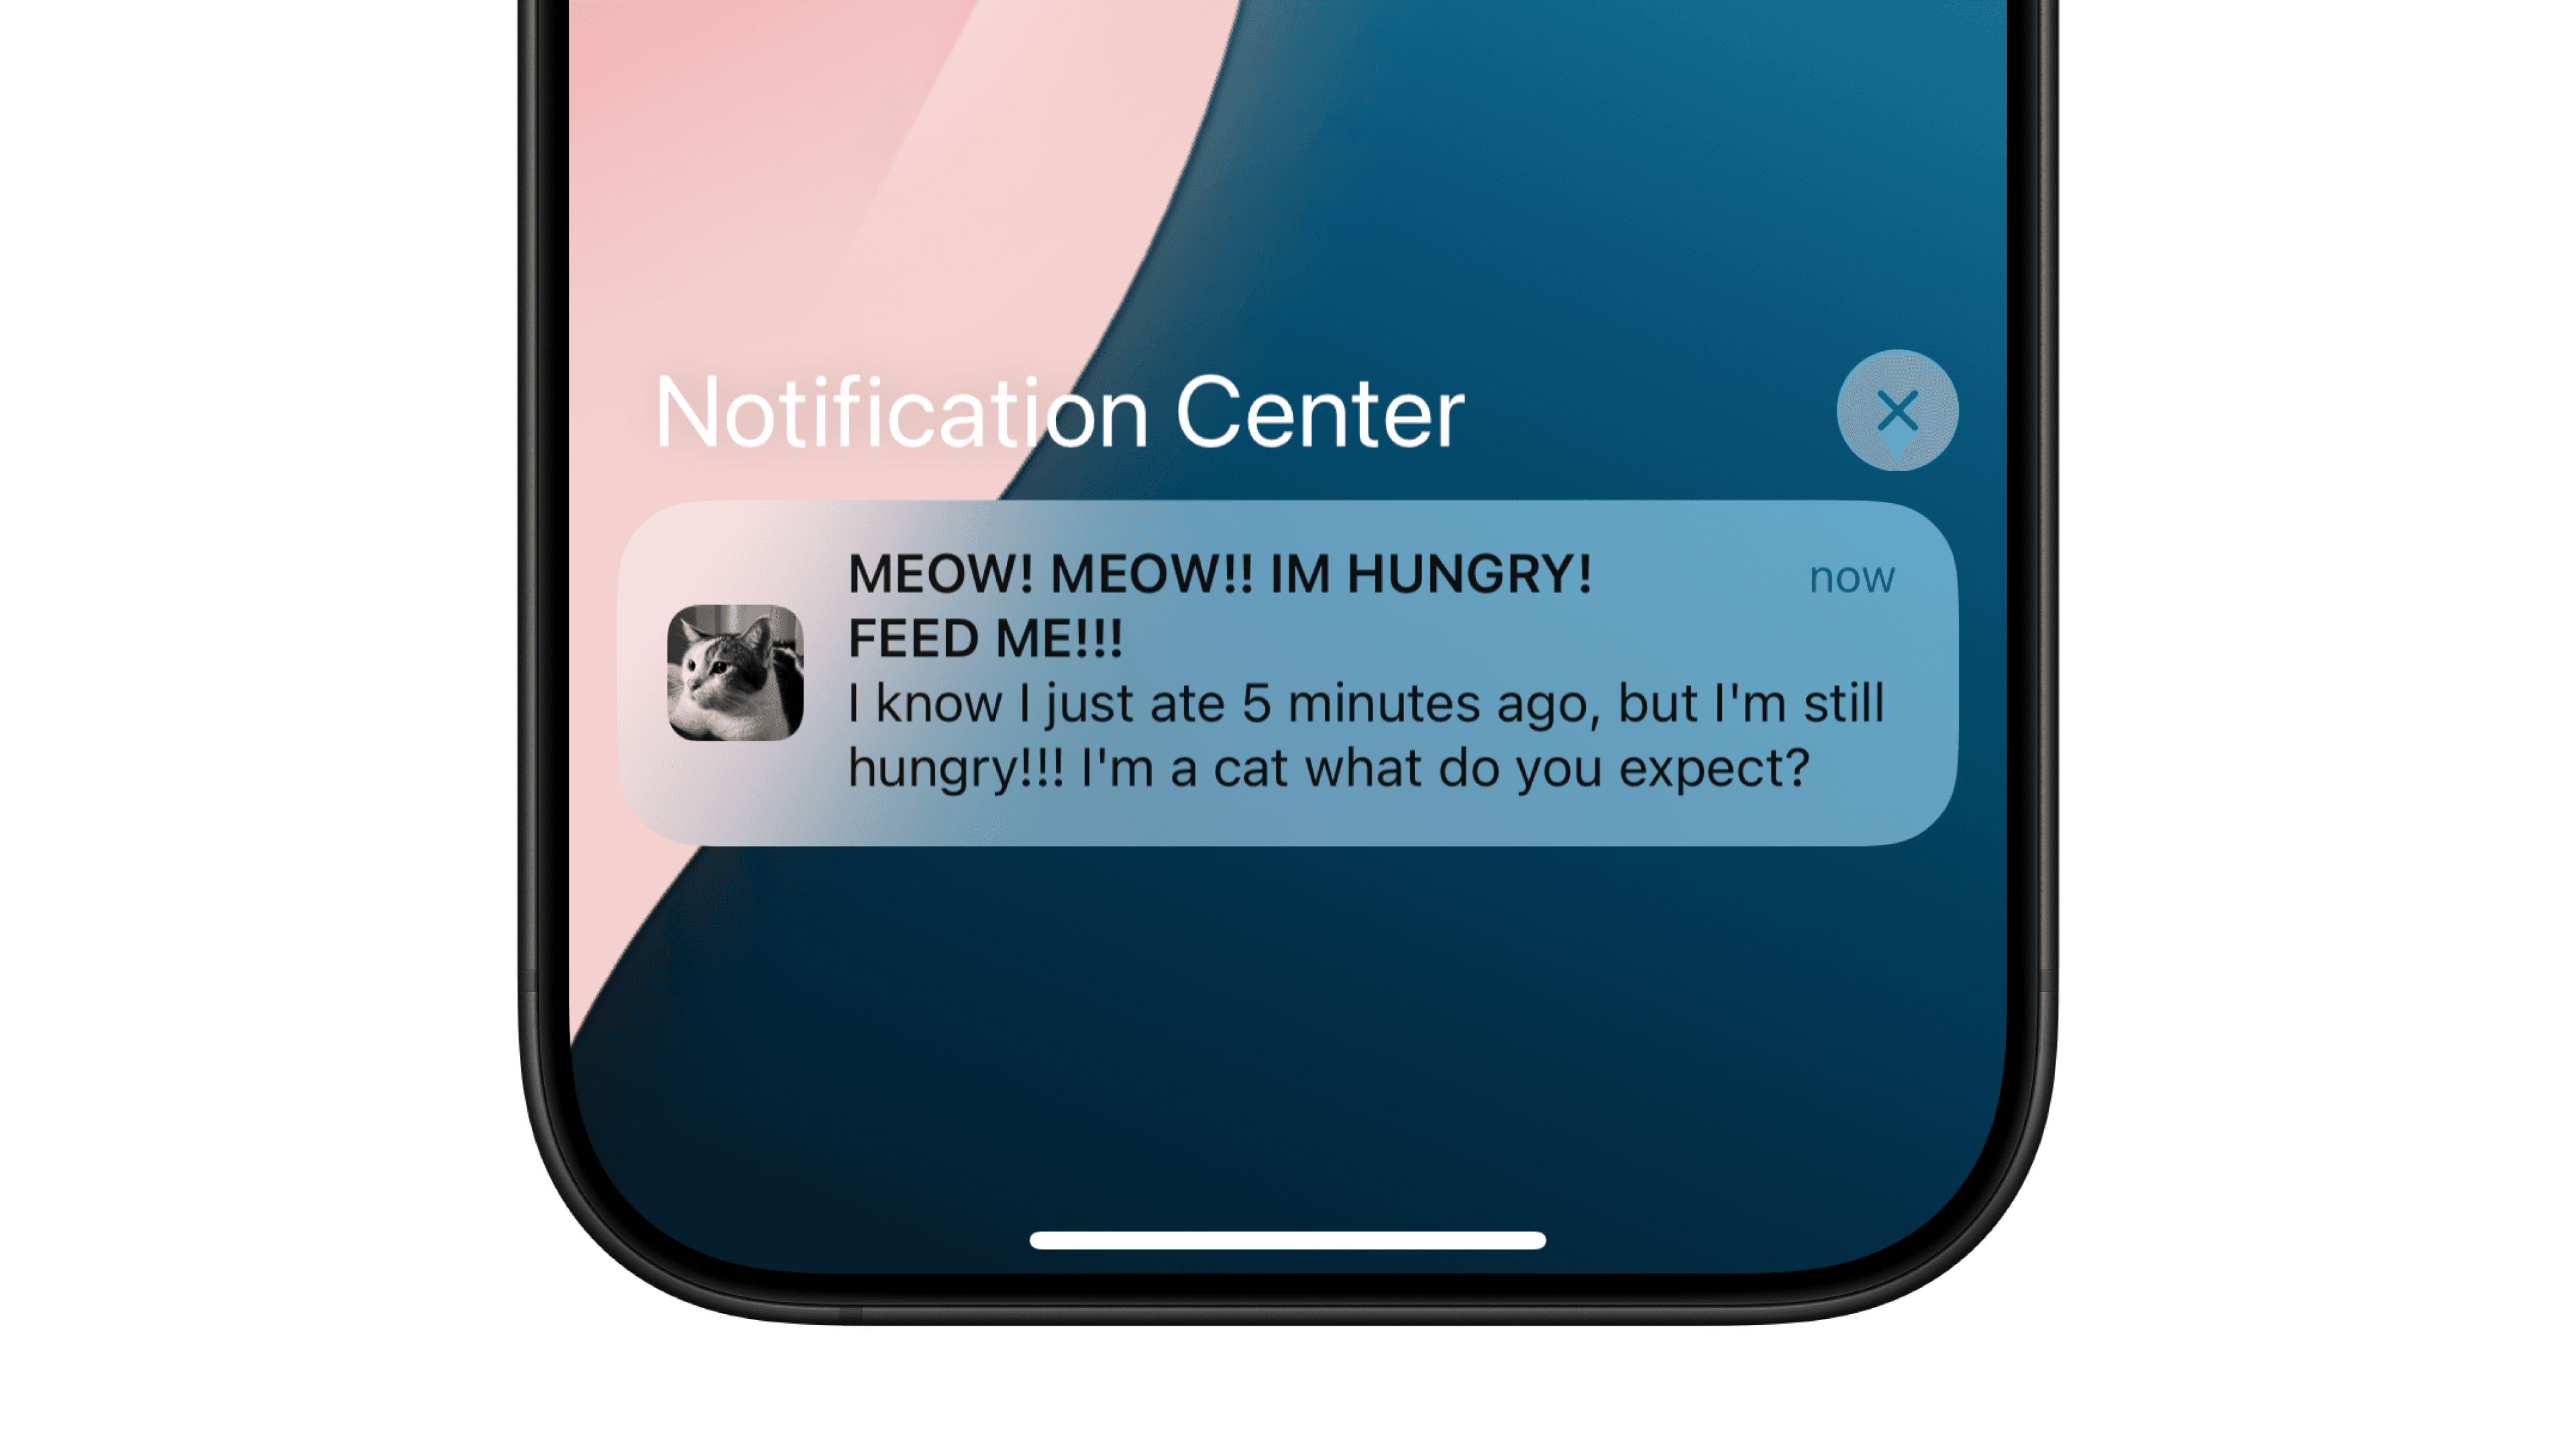
Notification Sounds
You can define the alert sound that plays when the notification is sent. There are several default options:
.default: The default notification sound.defaultCritical: The default sound used for critical alerts..defaultRingtone: The default ringtone sound.defaultCriticalSound(withAudioVolume: Float): The default sound used for critical alerts, with the ability for you to customize the audio volume
Custom Audio
Sound files must be less than 30 seconds. If the file is longer than 30 seconds, the system plays the default sound instead.
To add a custom audio file, the file has to use one of the following formats:
Linear PCM
MA4 (IMA/ADPCM)
µLaw
aLaw
You can use afconvert, a command-line tool, to convert audio files into the above formats.
To supply a custom audio, you will have to add it to your app's bundle.
UNNotificationSound(named: customNotificationSound): Supply a custom notification sound.criticalSoundNamed(customNotificationSound): Creates a custom sound for critical alerts.criticalSoundNamed(customNotificationSound, withAudioVolume: 1): Creates a custom sound for alerts where you can specify the audio level.ringtoneSoundNamed(customNotificationSound): Creates a custom ringtone sound
You can also use system audio files found in /Library/Sounds.
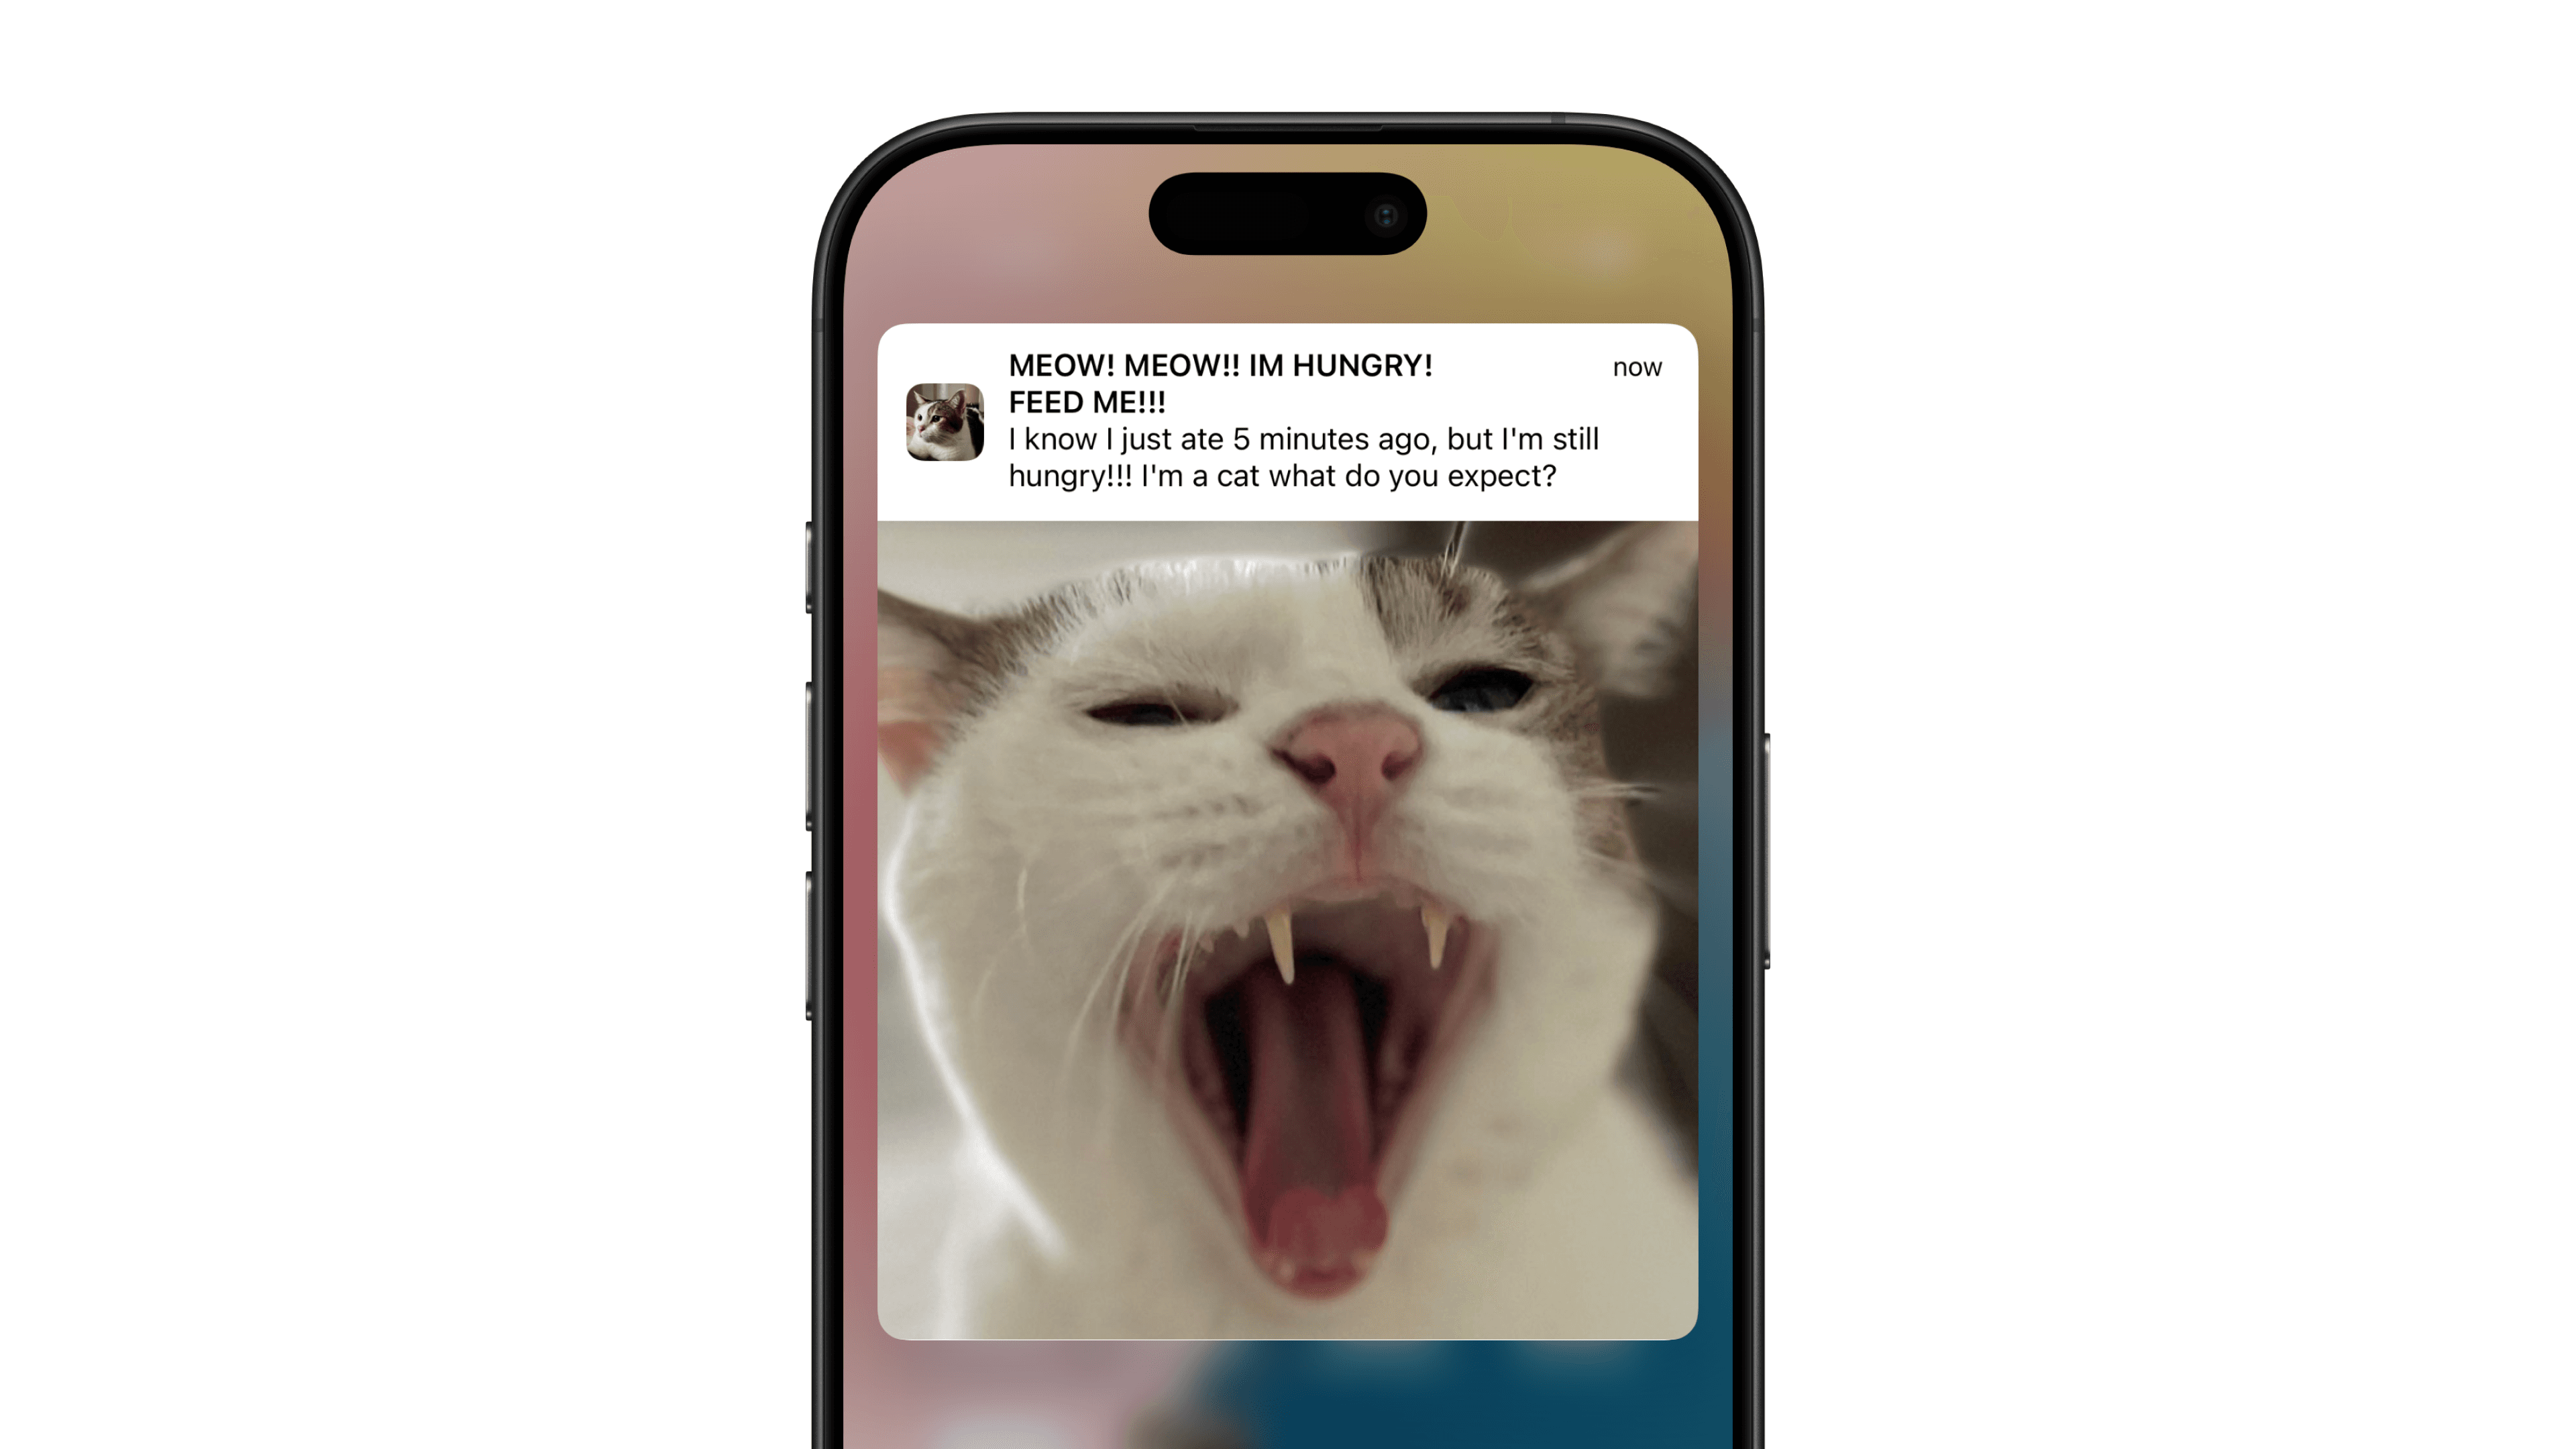
Attachments
You can add attachments in the following formats:
Audio (5 MB limit)
.aiff: Audio Interchange File Format.wav: Waveform Audio File Format.mp3: MP-3 Audio.m4a: MPEG-4 Audio
Image (10 MB limit)
.jpeg: JPEG Image.gif: GIF Image.png: PNG Image
Movie (50 MB limit)
.mpg/.mpeg: MPEG Video.mpeg/.mpg/.m2v: MPEG-2 Video.mp4/.m4v: MPEG-4 Video.avi: AVI (Audio Video Interleave)
To add attachments, you can use a UNNotificationAttachment. While the example uses a force try, remember to handle any errors that might be raised properly within production apps.
Grouping Notifications
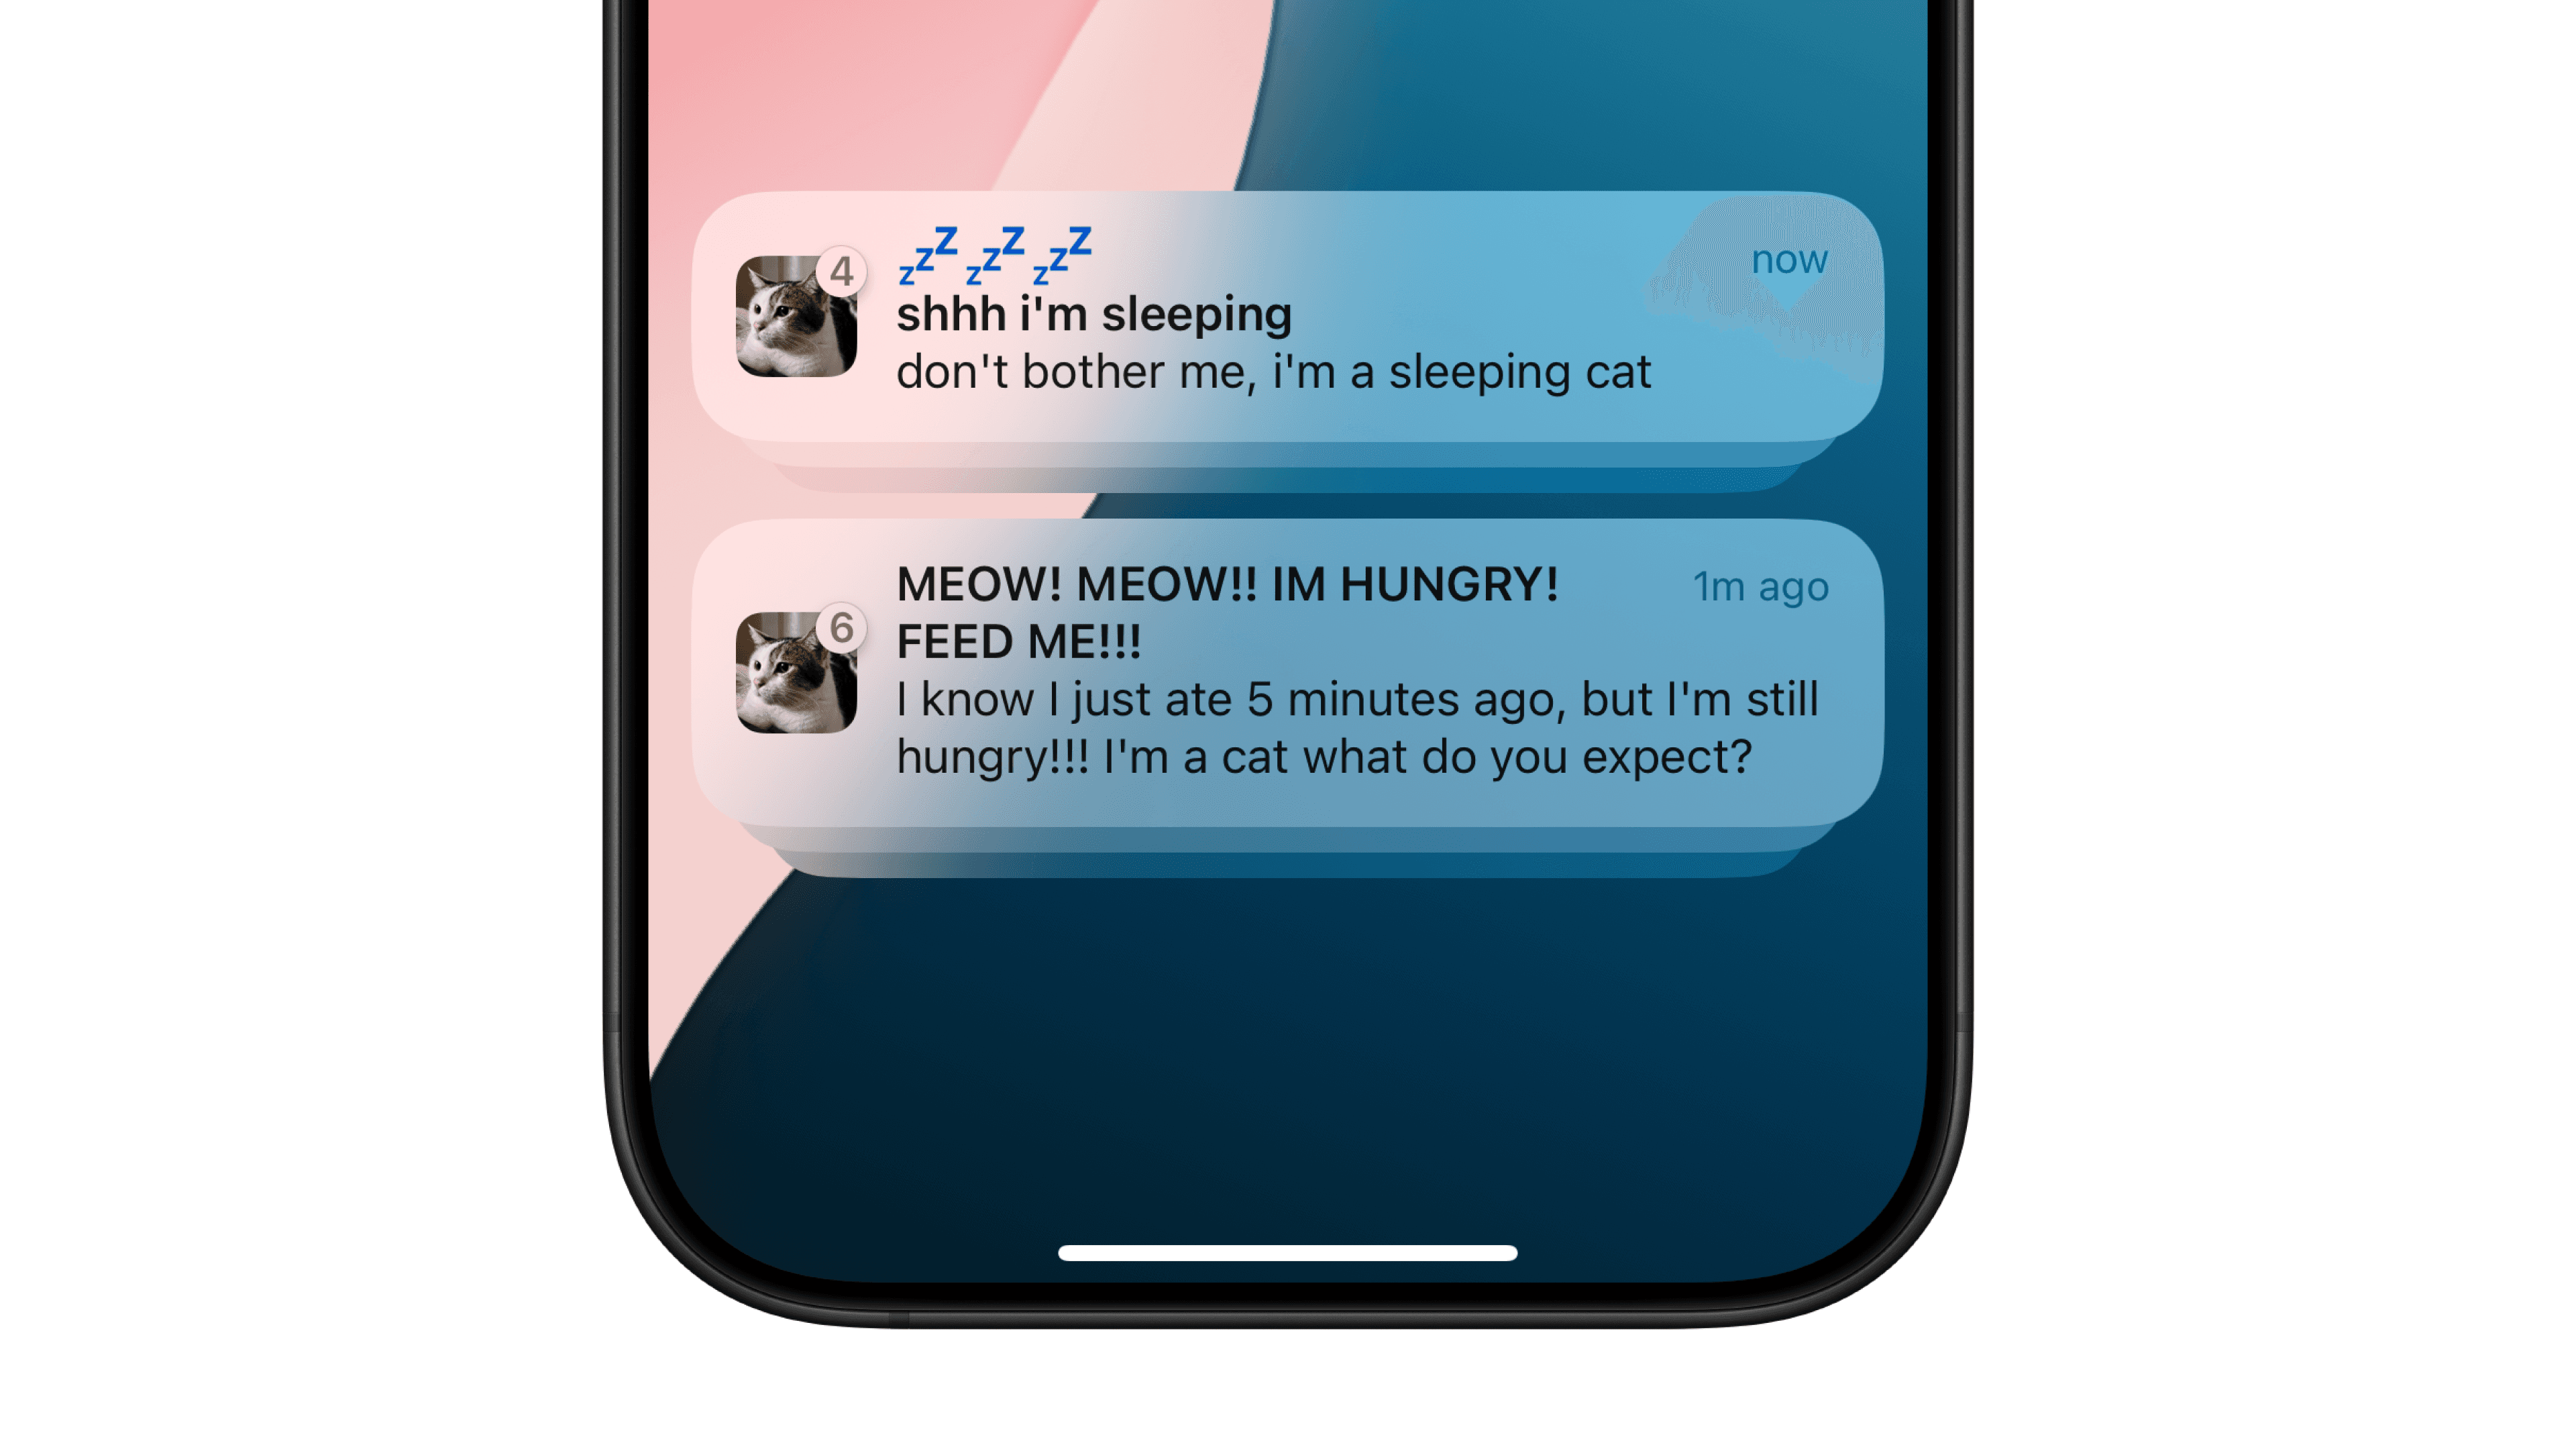
By default, on iPhone and iPad, notifications get collapsed into groups.
You can use a threadIdentifier to organize notifications into different groups. Each group of notifications should have it's own thread identifier.
Interruption Level
There are 4 interruption levels
.active: This is the default interruption level. Notification is delivered immediately, lights up the screen, and can play a sound..critical: Notification is delivered immediately, lights up the screen, and bypasses the mute switch to play a sound..passive: Notification is added to the notification list without lighting up the screen or playing a sound..timeSensitive: Notification is delivered immediately, lights up the screen, can play a sound, and breaks through system notification controls.
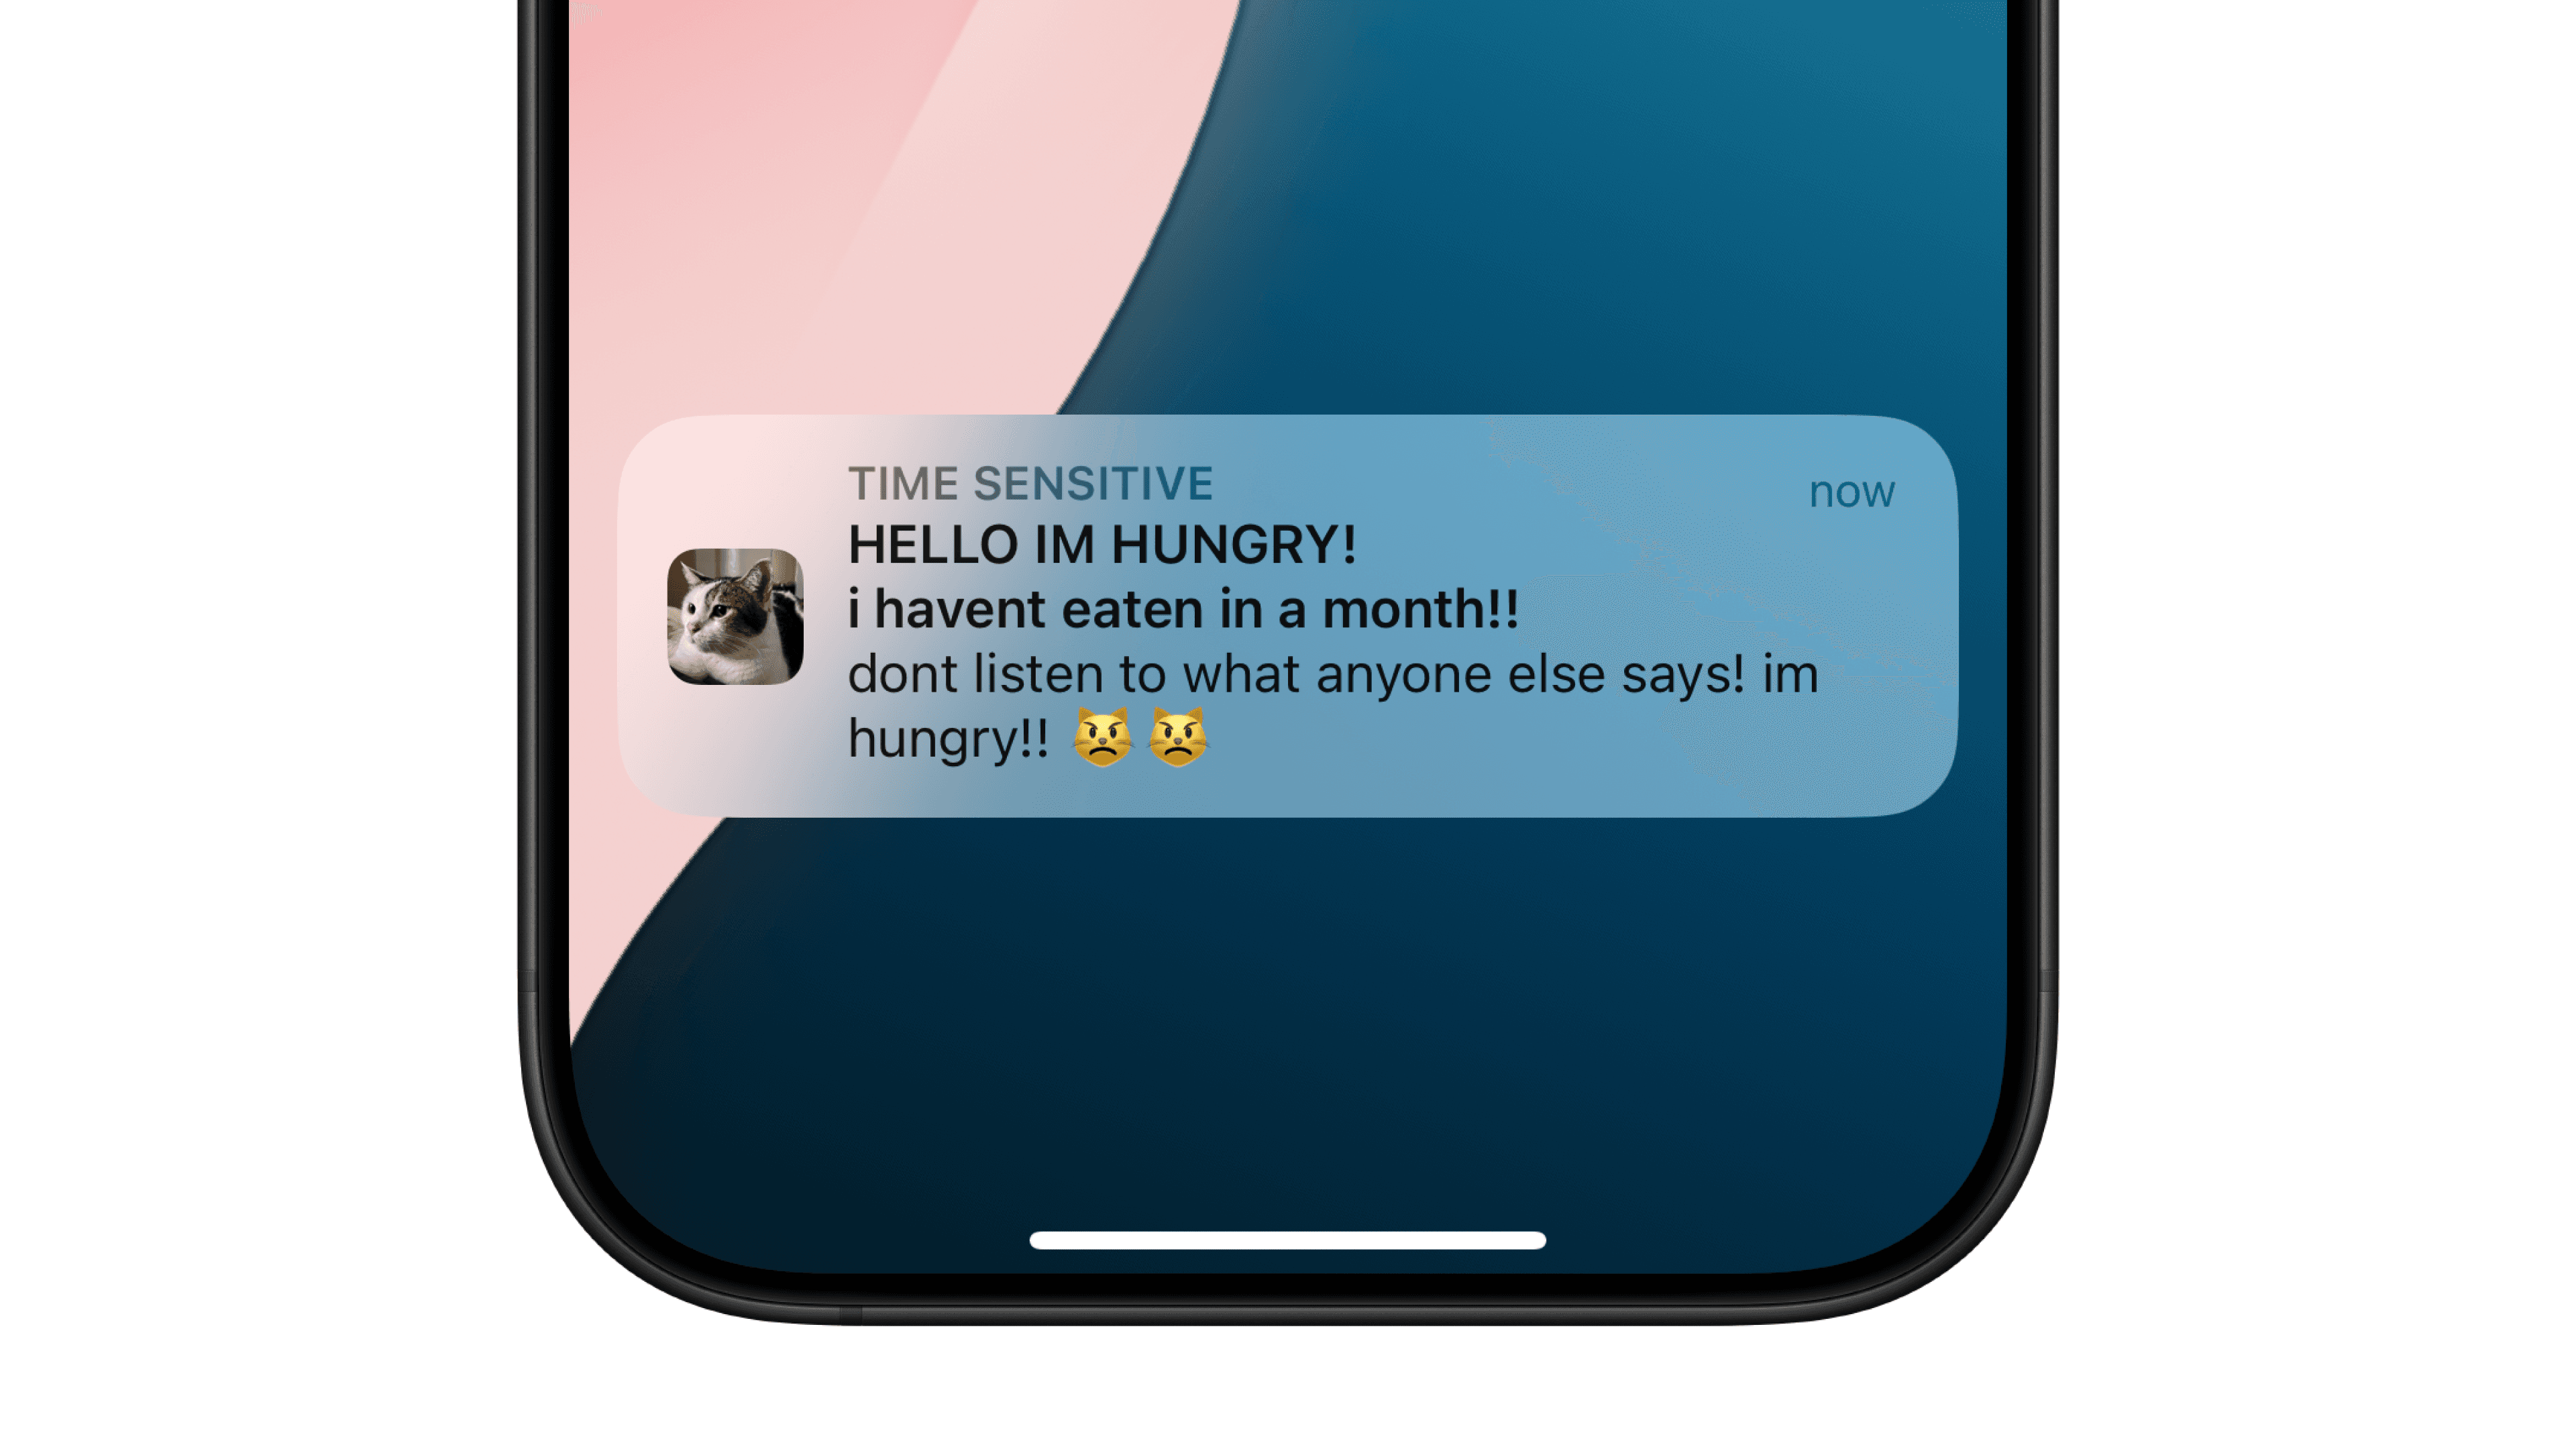
Time Sensitive Notifications
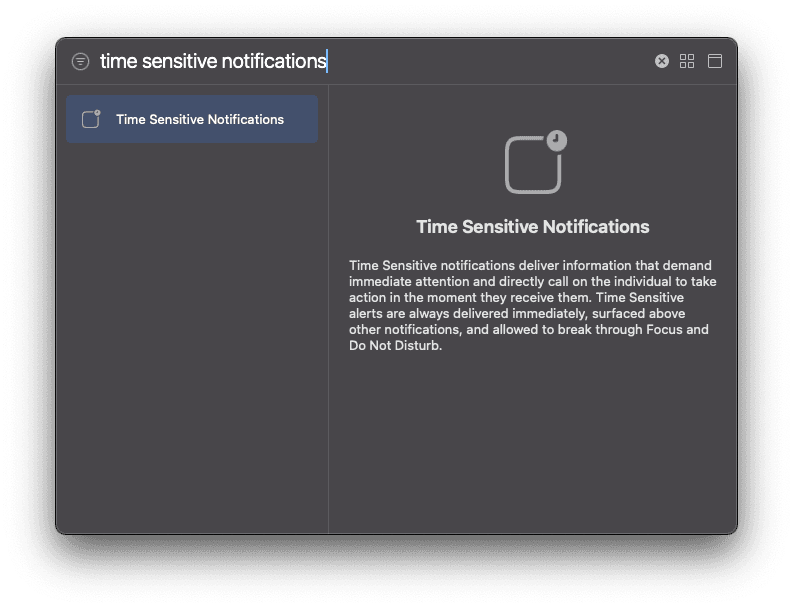
To send a time sensitive notification, you will have to add the time-sensitive entitlement.
Open the top-most
.xcodeprojfileSelect Signing & Capabilities
Select + or use the Command-Shift-L keyboard shortcut
Search for Time Sensitive Notifications
Add it.
Now, use the time sensitive interruption level.
Going Further
Notification Actions
Registering Actions
Defining Actions
You will need to create a UNNotificationAction. To create it, you will need to supply an identifier, a title, and any options you might want.
The possible options are
.authenticationRequired: The user will have to unlock their device before they can perform this action.destructive: This action is destructive and will be highlighted as a destructive action.foreground: Brings your app to the foreground to continue the action. Do not use this option simply to bring your app to the foreground.
Creating a Notification Category
To add the actions to a notification, you will have to first create a Notification Category.
Finally, you will have to register the Notification Category.
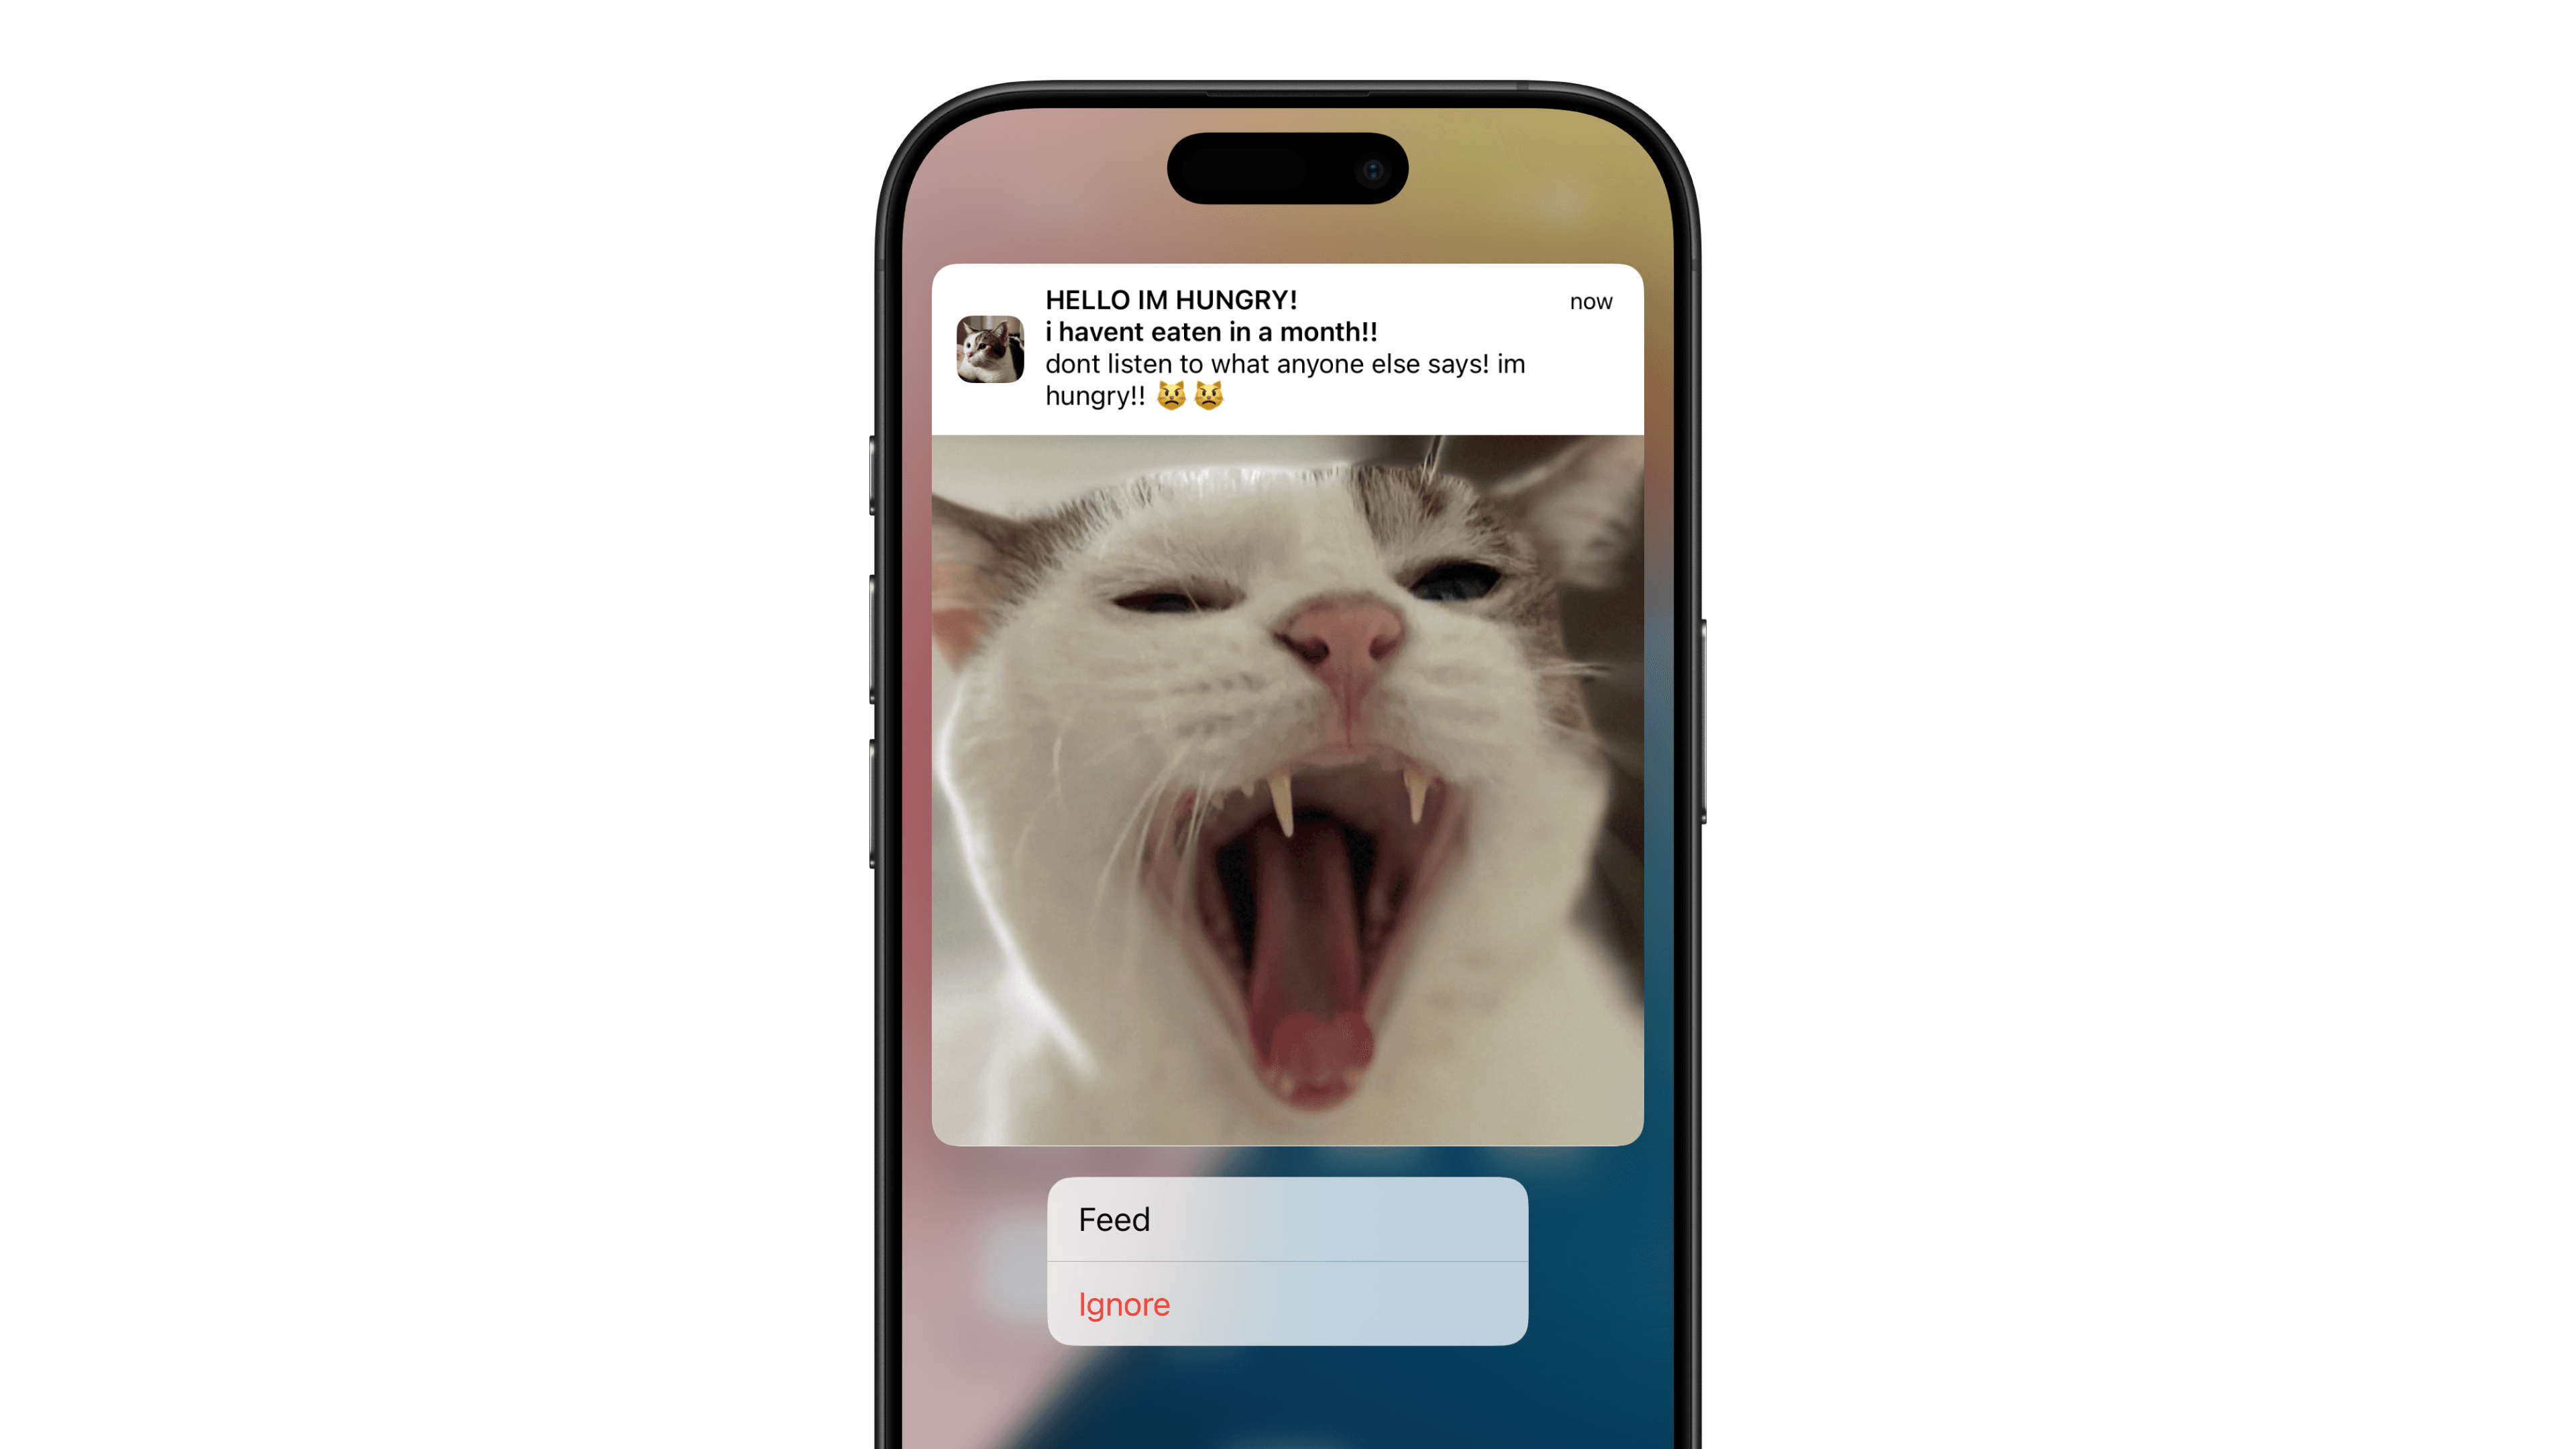
Adding Actions
To add actions into your notification, you can set the category identifier of the notification.
Adding User Info
You can attach pieces of information as userInfo. This allows you to append additional information that you can access when handling the notification's actions.
Handling Actions
To handle actions, you will need to add an App Delegate Adapter to use the UNUserNotificationCenterDelegate and implement the userNotificationCenter(_ center: UNUserNotificationCenter, didReceive response: UNNotificationResponse, withCompletionHandler completionHandler: @escaping () -> Void) method.
In the following example, an AppDelegate is created which conforms to the UNUserNotificationCenterDelegate and you can handle the actions and retrieve the notification's userInfo.
Setting the Badge Count
You can set the badge number in 2 places, from a notification, by setting it through its contents
Or through the notification center
In These Collections
This article can also be found in these collections.


